
Summer is on it’s way and we are fast approaching the solstice already. If you live in the northern hemisphere that means the days are long and there is a lot of bright sunlight about.
I know a lot of photographers only shoot at sunrise and sunset to get that warm, soft light. It’s easy to understand why they do this as you get lovely contrasts without them being too harsh, nice long shadows which provide tactility and interest, and wondrous colours which blend together. However, with the sun rising at about 04:30 and setting at 21:30 where I live just now, these are not the most practical times to be out photographing if you have the usual day to day commitments.
So what do you do? Do you just forego taking snaps during the daytime or just accept that they will not have the visual beauty of those captured at sunrise/set?
I don’t believe you need to do either. With a bit of thought and a few deft post-processing tricks, you can still produce great images during the daytime on these long, sunny, summer days.
In this post, I will look at some of the issues you will face taking photographs during the daytime and some help to overcome them.
The Bright Sunlight
During the daytime, the sun is extremely bright and harsh. If you choose to shoot directly into the sun you are going to get big exposure issues. Either the foreground will be underexposed or the sky will be blown out. This is fine if you want to create silhouettes but even then you are still going to be left with this brutal solar flare in your image.
Here is such a photo taken directly into the sun. I have tried to get the most balanced exposure I could, so there is still some detail in the foreground and the sun isn’t blown out too much. However, the image still isn’t great, the foreground detail is weak, washed out and underexposed, and the flare from the sun looks too brutal for me.
I really wouldn’t recommend shooting directly into the sun during the daytime unless you want to create something similar to the photo above.
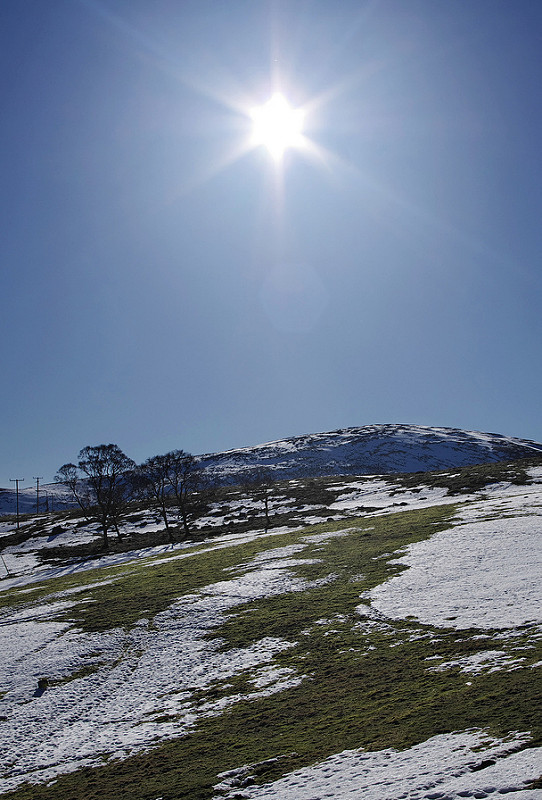
It’s probably best to get the sun well out of the shot so it’s illumination lights your shot but the camera’s exposure system doesn’t have to deal with that solar flare.
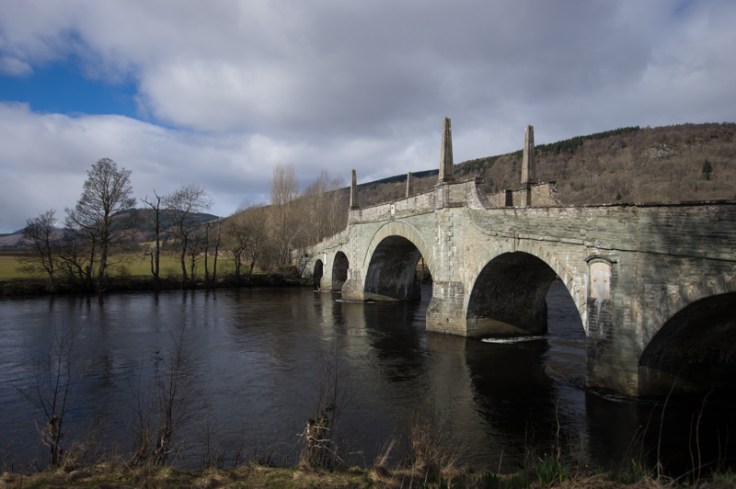
Here is another photo taken with strong daylight sun just behind my right shoulder. The image has a far better exposure balance and better contrast.
Lessening the Impact of the Sun
There are ways you could lessen the impact of the sun by using graduated filters or HDR but I have never been able to get a great result with either in strong, daytime sunlight (and I have tried plenty of times) so I wouldn’t recommend it.
Light up your Subject
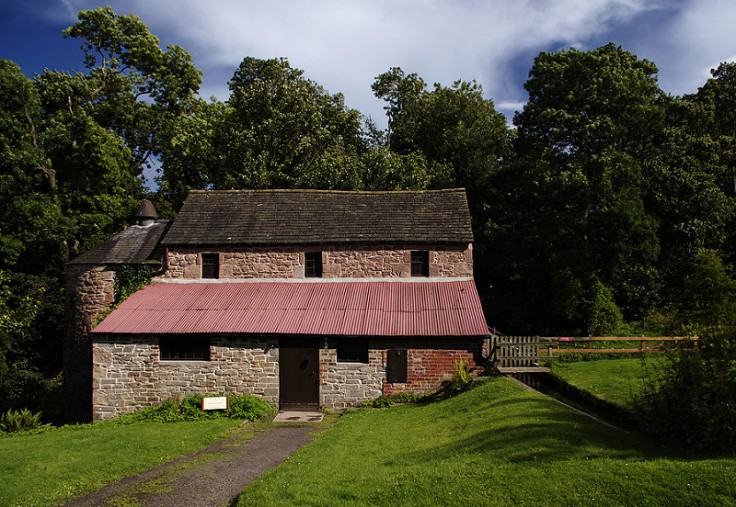
Also, I would recommend that the sunlight is actually illuminating the focal point of your photo as in the photo of the old mill building above. If the sun is hitting the back or side of your focal object it will look significantly underexposed due to the harsh light.
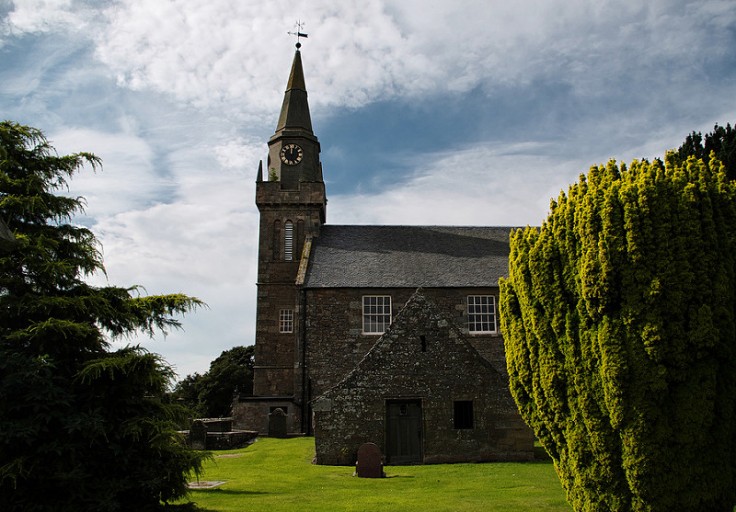
The photo below shows this. The light is hitting the side of the church but not illuminating the frontage facing me. As such, the building looks underexposed and lacks detail on it’s front face.
Contrast Issues
The extreme luminosity of the sun during the day will lead to strong contrasts between the light and shade. Provided you are not shooting directly into the sun your camera’s metering system should be able to deal with this ok as shown in the photos above.
Many people don’t like these strong contrasts in images, But they open up a great creative opportunity.
In these photos you will often have areas that are either very bright or very dark and by thinking of the image just in terms of these areas of light or dark you can compose an eyecatching photo.
The image below is an example. When taking it I just looked for the areas of light and dark and composed the photo using these. I paid little attention to the more intricate details.

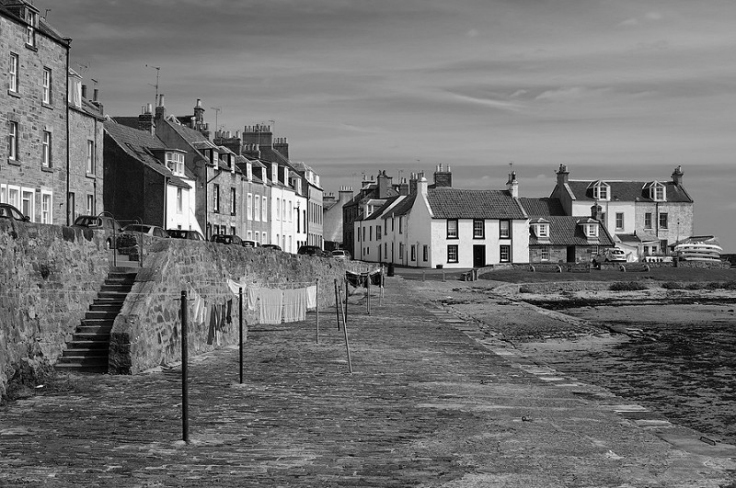
Using Black and White
Images with strong contrast often work well in black and white. As I said, when taking these you should see the image mostly just as areas of light and dark and thus if you convert them to B+W they should work well as you are removing the interference of the colour which was not a primary consideration when taking the photo.

Dark Skies in Black and White
A neat little post-processing trick you can do with these high contrast black and white images is to darken the skies. In Lightroom and Photoshop when you convert an image to B+W you can then alter the luminosity values of the underlying colours. By just moving the blue slider down you can darken the blue areas of sky giving a great effect which can be achieved in next to no time.
This is really handy because often when converting these high contrast images to black and white, the blue in the sky comes out as a midtone grey which is pretty unappealing. So by darkening it down you add some contrast and drama to it.
Here is an example. Here is an image of Mains Castle in Dundee taken on a sunny day.

Here it is converted to B+W. The midtone grey in the sky inhibits the high contrast B+W effect.

By decreasing the luminosity in the underlying blues, the sky is darkened. The image now looks much more contrasty and dramatic.

This little trick is quite commonly used in B+W photos and it is getting slightly tired now but it is effective nonetheless.
Empty Skies
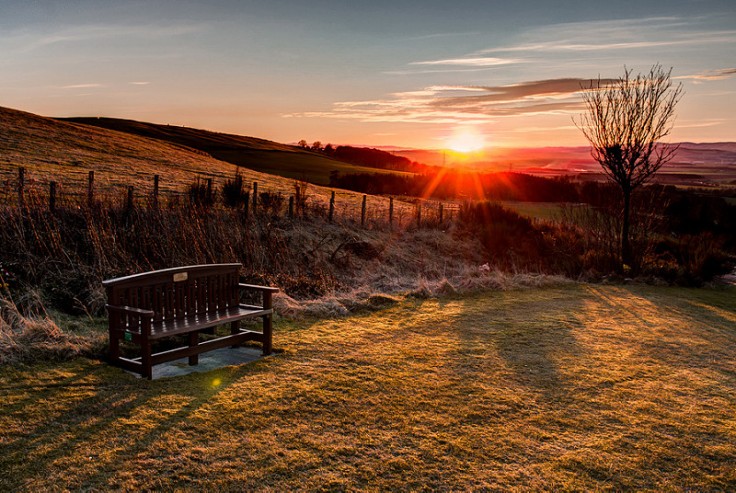
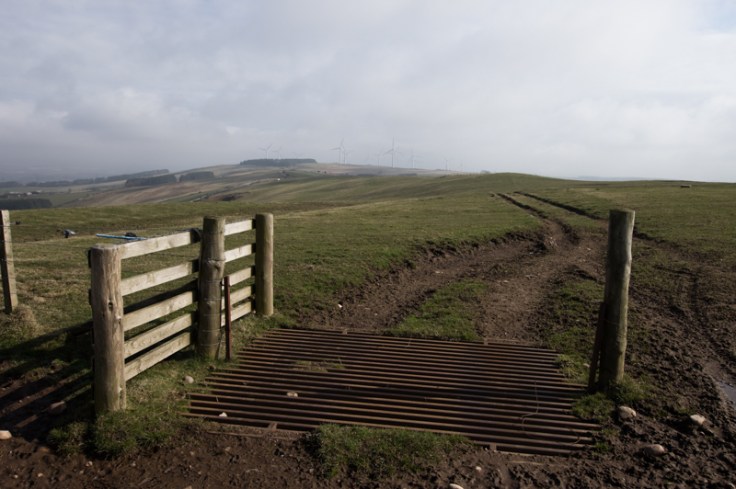
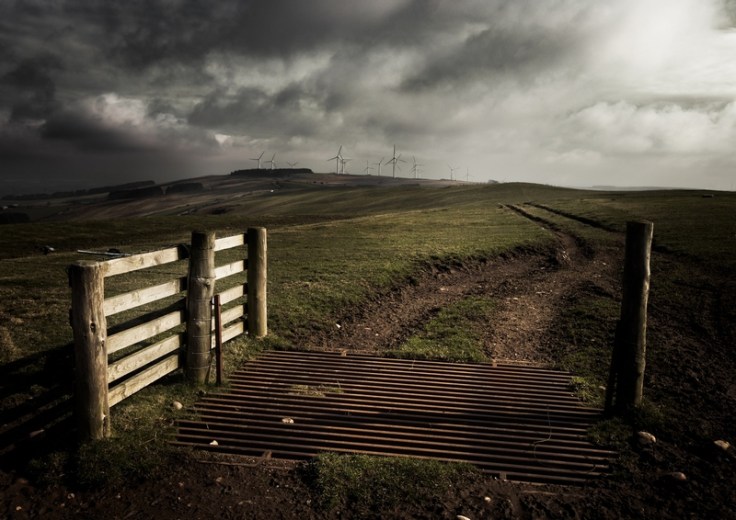
Another issue with bright, sunny days is that you are likely to get cloudless skies. This can be great if the composition of the photo lends itself to such, like the photo below. Usually simple compositions with little fine detail benefit from having an empty sky.
However, more often than not, an empty sky provides a swathe of unwanted dead space in an image’s composition. How do you get over this? Just stick a different sky in. I have done a full tutorial on this previously which can be found here. Here is the example images used before and after.


Colour Control
This is one of the biggest issues with daytime photography and often one of the most overlooked.
Why do we like sunrise/sunset colours?
During sunrise and sunset, the light from the sun has an orangey, yellow hue to it. This bathes everything in this colour. This effectively tints the perceived colour of everything it illuminates towards this colour. By doing so it unifies the colours making them more pleasing on the eye as there is less colour contrast. As artists might say, it has a limited palette.
Here is an example below. The orange light at sunset tints all the colour of all the objects it illuminates.
What does Daylight do to the Colours?
During daytime the light from the sun is white. This white light does not tint the perceived colours of the objects it illuminates. As such, you see their natural base colours.
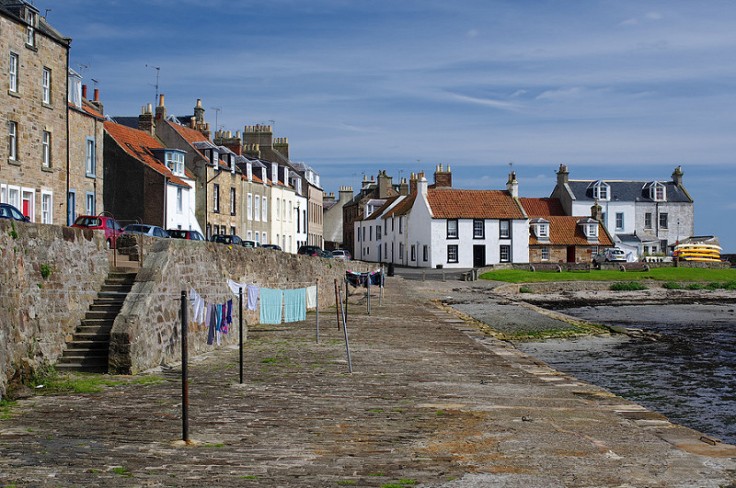
Now, the natural or built world can be wondrous in it’s beauty with abundant and vibrant colours and sometimes these colours can create a contrast integral to the composition such as the example below. The blue of the sky and the complimentary colour of yellow in the field make for a strong contrast.

However, often these colours appear more haphazardly leading to a messy palette of colours from all over the colour wheel.
Here is a good example. Every colour imaginable seems to be included which creates unwelcome colour contrasts that upsets the composition. It also just makes the image look slightly messy.
Here are a few quick things you can do to help soften the impact of these clashing colours. I will show these using the image above.
Convert to Black and White – The easiest way to deal with colour problems is to get rid of the colour altogether. This is maybe just an easy option out and certainly restricts the creativity. Moreover, some images don’t lend themselves well to black and white, especially those with a lot of midtone detail such as this one.
Desaturate the Colours – Much like the above, you just reduce the colour saturation but not all the way to B+W. This reduces the visual impact of the colours, thus reducing colour contrast. Again, it is a quick, perhaps lazy solution which doesn’t always look too good.

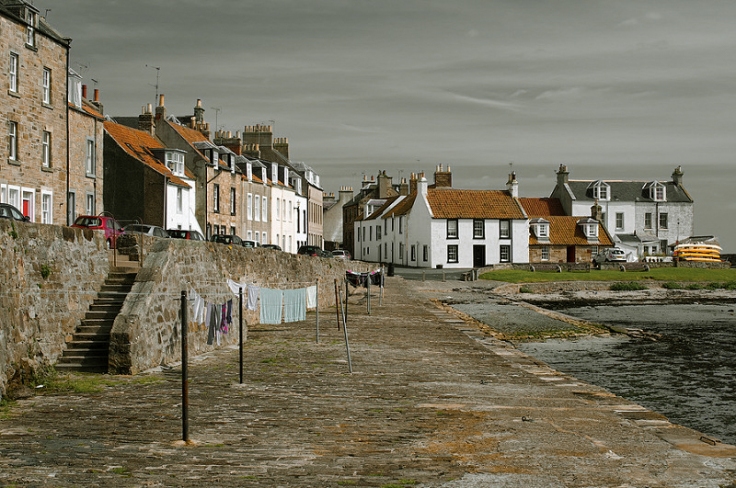
Tint the Colours Universally – You can add a semi opaque layer of colour over an image which helps unify the colours. This again reduces colour contrast. The image below is tinted orange.
Tint the Colours based on Tonal Value – Most commonly this is done as split-toning where the shadow areas are tinted a certain colour and the highlight areas tinted another colour. This is a popular way of doing it as it helps unify the colours, thus reducing colour contrast but also giving a greater degree of artistic flexibility over the final colours. The image has the highlights tinted sepia and the shadows tinted blue. One potential downside of this method and that above is that is changes the white balance meaning the whites are no longer true white. This may or may not be preferable.

Alter Individual Colours – Packages such as Lightroom and Photoshop allow you to alter the hue, saturation and luminance values of different colour groups. This method gives huge control over the colours and allows you to target individual problem colours and deal with them in isolation. The colours below have been altered to push them to warmer hues, thus helping to unify them but whilst also keeping the correct white balance.

Remove the Blue from the Sky – This is a favourite trick of mine but im not sure if it’s that popular. I find the blue sky on sunny photos to be very invasive. I often find that by totally removing the blue from the sky can be a quick fix to a more pleasing colour scheme.

All of the above – Of course, the best method is probably to use a mixture of the different techniques above to change to the colours to your own artistic preferences as the image below shows. However, I hope this section has demonstrated that the problem with daylight colours can be overcome.
Turning a sunny day into a dark, moody day
One other thing I want to touch upon. I have found that photographs taken on sunny days make a great base for doing a dark, stormy looking image. The sunlight illuminating certain objects within the photo works beautifully when the image is post-processed to look dark and moody. In my next post I will do a post-processing tutorial about this but here are a few before and after examples.


Conclusion
It may be a case that you like photographs taken in sunny, daylight conditions. But for many, including myself, I find the conditions to be less than ideal for getting good photos. However, I hope I have been able to demonstrate that with a little bit of thought and post-processing trickery, you can still take full advantage of these conditions and get a great result. So there is no need to leave your camera at home on these long sunny, summer days, you can enjoy the sun and getting snapping away at the same time.
Thanks for Reading,
Neil


Excellent post. Thanks for sharing your knowledge.
LikeLike
Thanks. Glad you found it useful
LikeLiked by 1 person
hey,
ive been trying out your techniques for eradicating blue skys from my landscape pictures.
I completely agree, a blue sky can often create a massive colour clash with the land below. you wouldnt attack a blank canvass with contrasting primary colours when depicting a landscape, so why do it with photography? makes sense.
I love the drama you are able to create from changing a boring textureless sky into a storm and it looks fantastic in your shots, but im having issue when i try it. the prosessing of the shot comes out fine, but when i step back and look at it, I find it really unbalanced in that i have a lovely colourful landscape, but a monochrome sky? to me it appears unnatural and a bit jarring. im not sure what i can do to help the blending?
Im also not sure if this really is an issue or if i am no longer actually seeing a photograph in front of me, but instead a series of techniques and proceedures! Knowing the magicians secret spoils the illusion. I hope that makes sense.
Mike
LikeLike
Sorry for the delay in replying. For some reason comment notifications dont seem to be coming through.
Glad to hear you are having fun sticking on stormy skies. The colour issue is a bit of a problem. The quickest way to solve it is to just desaturate the other colours but this may not give the best outcome. You can also try tinting in other colours to diminish colour clash in the foreground colours. I have started doing most of the colour grading at the start of my workflow now. I find it easier doing it here rather than later on. In this post https://photographic-musings.com/2018/05/22/daytime-dilemma/ I had a quick look at the colour issue. I may do another post on it which is a bit more in depth.
Neil
LikeLike