You will often hear people talking about vignetting a photograph, but what does this actually mean and why would we want to do it?
What does it mean to Vignette a Photograph?
The dictionary defines it as ‘produce (a photograph) in the style of a vignette by softening or shading away the edges of the subject’
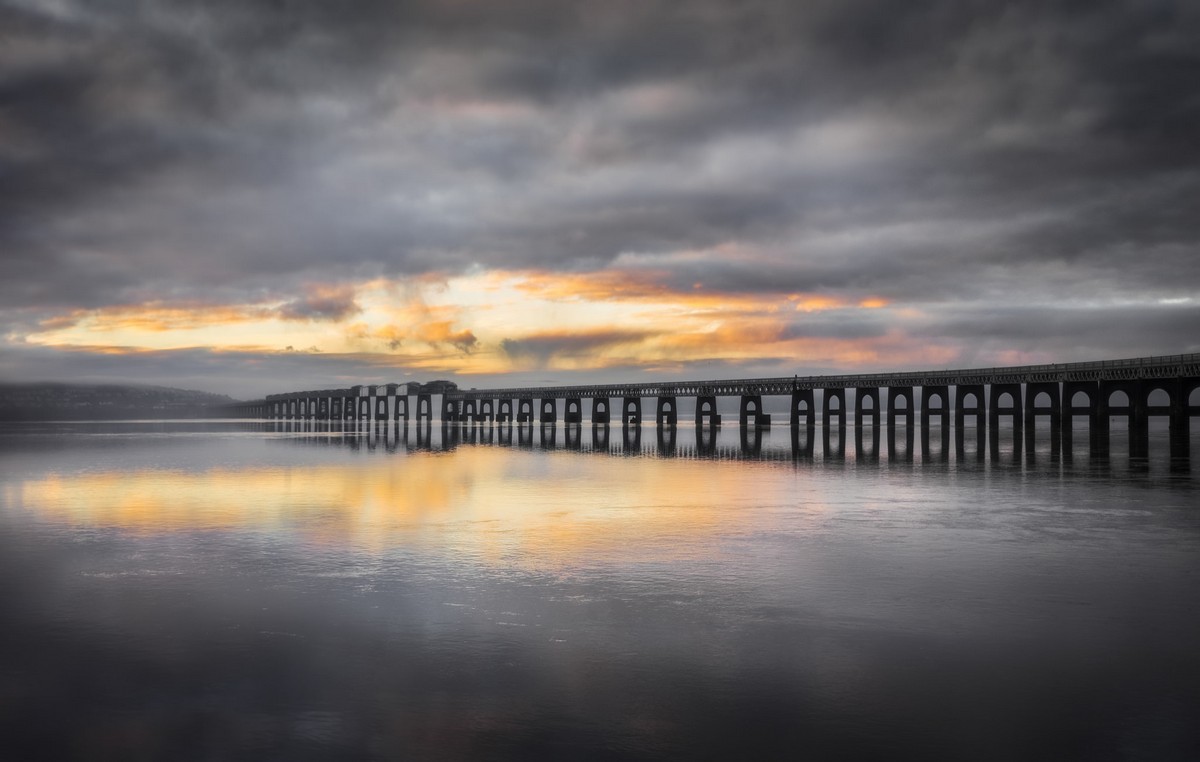
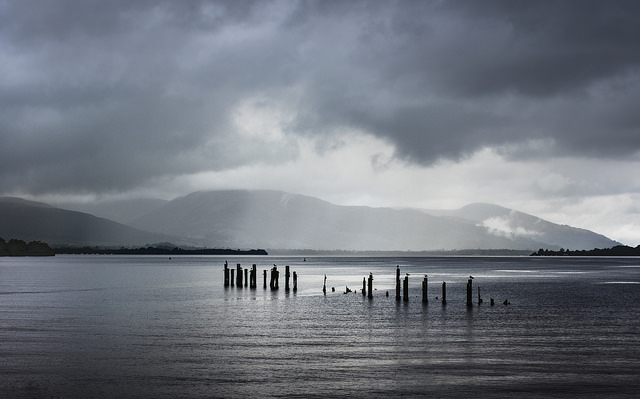
This pretty much sums it up. It involves altering the edges around a image to create a softening or shading effect. Here are some examples of photos with vignetting applied. These images have had the edges darkened or shaded away.
")

Compositional Benefits of Adding a Vignette
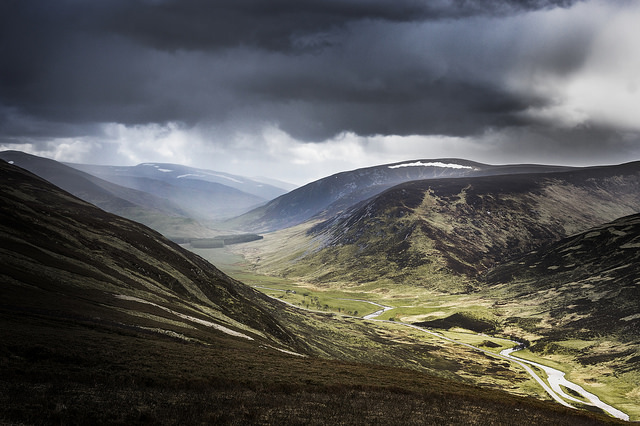
In most photographic compositions, the main points of interest will not be located around the edges of the image. They usually tend to be further into the image, nearer the center. As such, the edges can often contain unnecessary detail and distractions which can draw the eye away from the main points of interest. As vignetting softens away the edges it reduces the visual impact of the detail around the edges and pushes the viewers eye more towards the center of the photo.
This can be seen with the two images above. The eye is drawn to the main focus of interest which is just off center in both images. The vignetting helps emphasise this and draw the eye towards it.
Different Styles of Vignetting
As vignetting is a softening around the edges of an image there are many different ways this can be achieved. Here are a few of the most common styles of vignetting.
Darkening
This is the most common way of vignetting a photograph. The edges fade towards black. It is not necessary to take them fully to black and sometimes just a slight darkening around the edges is sufficient. Here is an example showing the original image without vignetting, a subtle amount of darkening, and then more pronounced darkening.


Notice how your eye is drawn more towards the center of the image as the vignetting becomes more pronounced.
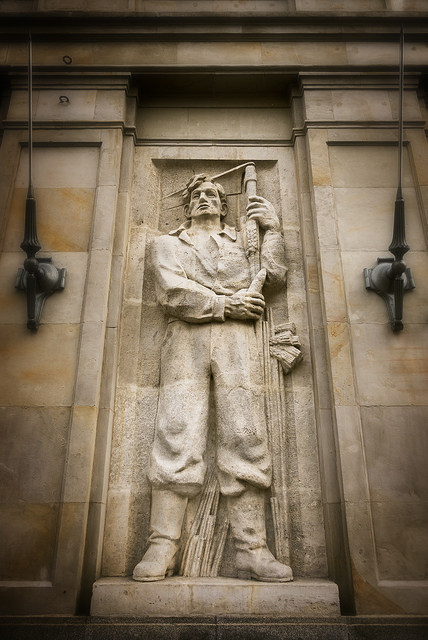
This style of vignetting, when applied subtly, is almost unnoticeable but can still have a significant impact on the composition which is probably why it is so commonly used. It also tends to favour darker and more dramatic images, often increasing this dramatic feel within them. Here is an example of this.
Lightening
Instead of the edges fading towards black, they fade towards white. Again, an example with 3 images, one without vignetting, a subtle lightening around the edges, then a more pronounced effect.


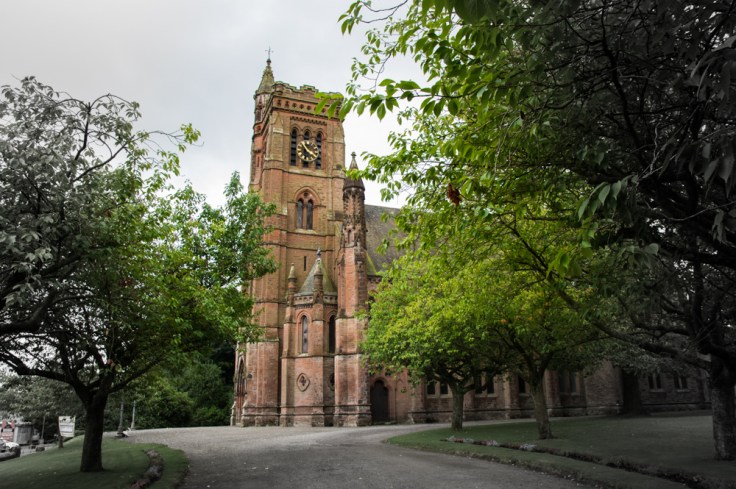
This type of vignetting gives a whispy, ephemeral feel to an image and gives it an aged look. It is probably more suited to lighter, high key images such as the examples below.


These are the most commonly used vignetting styles, but if you get creative, there are many other ways you could soften the edges around an image. Here are a few others.
Blurring
Instead of altering the luminosity around the edges you can alter the sharpness by adding a blurring effect around the edges. This can be quite powerful but can also look slightly unrealistic.

Desaturation
Vignetting by reducing colour saturation around the edges. This again can look quite unnatural but can still be useful if you have heavily saturated colours around the edges of your image.
These are just a couple of other examples, if you use your imagination, you can think up many others. And of course, you can use multiple techniques together e.g. you could darken and blur the edges as shown below.
Targeted Vignetting
Although vignetting effects the edges of the image, it doesn’t have to be consistent around the edge. Depending on the subject matter of the photo you can alter different areas around the edge by different amounts to create the effect you desire.
This example illustrates this. Most of the edge has been darkened except for in the bottom right of the image which has not been affected. This channel of light to draw your eye into the center of the photo.
A Post-Processing Technique?
In theory you could vignette an image at the time of shooting by adding elements in front of the lens which could have the effect of altering the edges of the image. However, I would not recommend trying this as it could be time consuming and the results may be difficult to reverse if they are undesirable.
Post-processing software offers huge amounts of flexibility and control for applying these techniques so I would recommend you using this. Which software you choose to use if up to your preference but the vignetting effects can be easily achieved in the standard image editing software such as Photoshop, Lightroom, GIMP etc.
I will now look at a few ways this can be achieved.
Vignetting in Lightroom
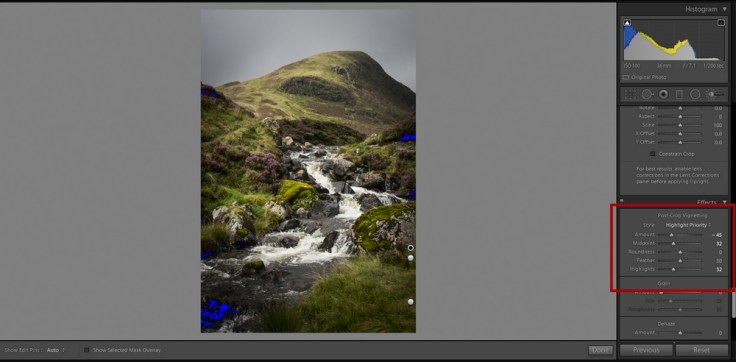
Post-Crop Vignetting
Lightroom has a specific tool for vignetting which allows darkening or lightening around the edges. Although it is a quick and easy tool to use it does not allow much control over the areas affected by the vignetting.
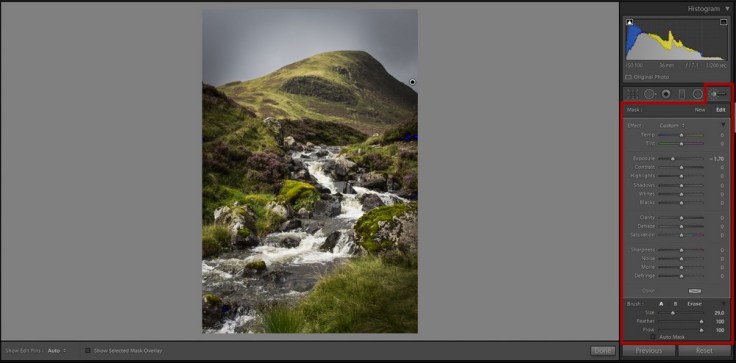
Adjustment Brush
The adjustment brush allows you to paint into specific areas of the image with the desired effect. What the adjustment affects is controlled by the sliders in the dialogue. This probably the preferred technique for vignetting in Lightroom as it allows significant control over the adjustments used e.g. exposure, saturation, sharpness etc, and allows you to target the vignetting to specific areas.
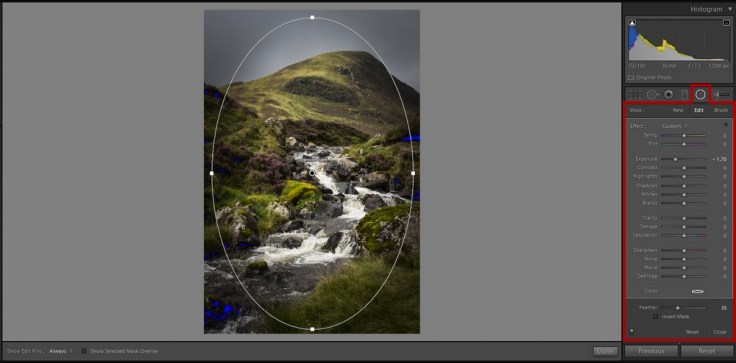
Radial Filter
This works similarly to the adjustment brush as it gives the same available adjustments. This gives you considerable flexibility in the type of adjustments you make. However, it is limited to affecting an oval area. This is good if you want symmetrical vignetting however.
Adding a Vignette in Photoshop
There is a mind boggling number of different ways you could apply vignetting in Photoshop, so I will just show you the techniques I use.
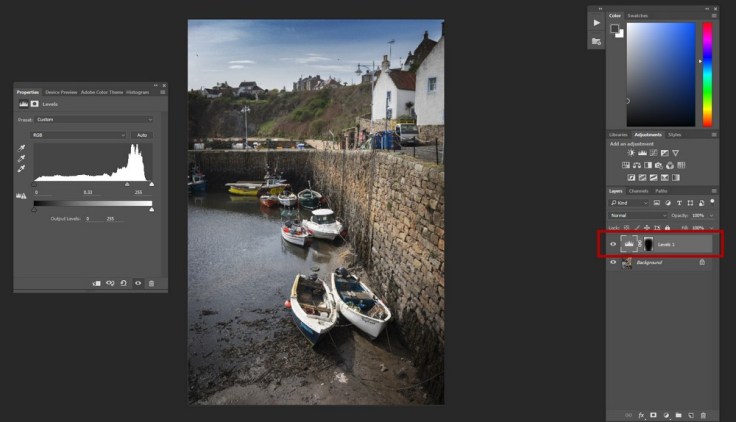
Levels / Curves Adjustment Layer
For luminosity vignetting I add either a levels or a curves adjustment layer, set it to the desired effect, then use a layer mask to target it to the specific parts of the image. This gives huge amounts of control over the level of luminosity change and also the areas the effect targets.
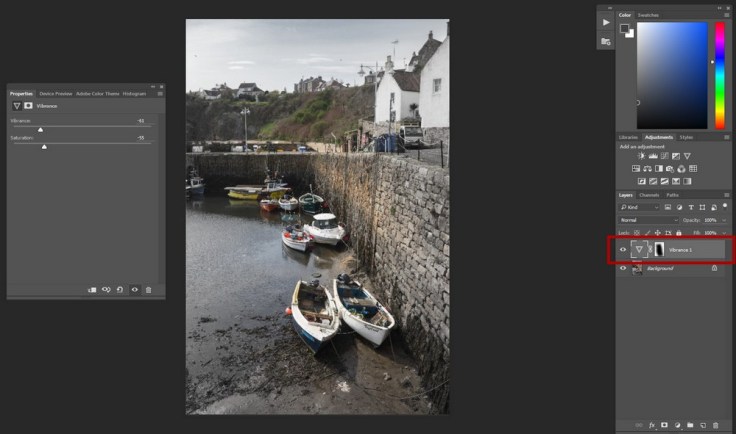
Other Adjustment Layers
The same technique of using an adjustment layer with a layer mask can be used for many other vignetting styles depending on which adjustment layer you use. E.g. a vibrance adjustment layer can be used if you want to desaturate the colours.
Blurring and Similar Filter Effects
Some effects, such as blurring, are not available through adjustment layers and have to be applied as a filter through the filter drop down menu. If you want to apply such an effect you will have to create a duplicate or stamp-visible layer depending on the situation, apply the effect to this layer, and then use a layer mask to target it to specific parts of the image.
Below is an example. I created a duplicate layer of the background, added a gaussian blur to it then used a layer mask to target it to specific areas.

Using these techniques above will give you access to a huge range of vignetting affects and they are quick and easy to apply.
I would also recommend using Photoshop over Lightroom for doing the vignetting as it gives a much greater level of control over the effects applied.
Other Software
Different post-processing software will use different commands however the general principles of how to achieve these vignetting effects will be similar. E.g. G.I.M.P. doesn’t use adjustments layers but similar effects can be achieved using duplicate layers with the effects applied and a layer mask.
Conclusion
Vignetting is a powerful, flexible, and easy to apply technique which can aid the composition of an image considerably. It is a technique I use in most of my photos, even if just subtly. I would definitely recommend giving it a go and trying out different vignetting styles to see how they change your photos.
Thanks for Reading,
Neil


Woow nice.. I truly learned something.. Keep it up.. I always enjoy your posts..
Check out my new post.. Its on fabulous styles every lady should rock.. Plus the styles also suit the pregnant ladies..
https://tinutrends.wordpress.com/2018/04/19/7-fabulous-styles-you-should-rock-when-you-get-pregnant/
LikeLiked by 1 person