In this previous post, I gave a little tutorial on how to stitch a new sky into a photo. A while after someone said they had trouble with altering the selection of the sky area. So this post serves a sort of addendum to explain the different modes when using the selection tools.
Making and Refining a Selection
This is the bit out of my previous post that caused the confusion:
When using the Quick Selection Tool it can often not select the edges correctly. So I recommend zooming into the image and checking the edges of the selection and making any adjustments.
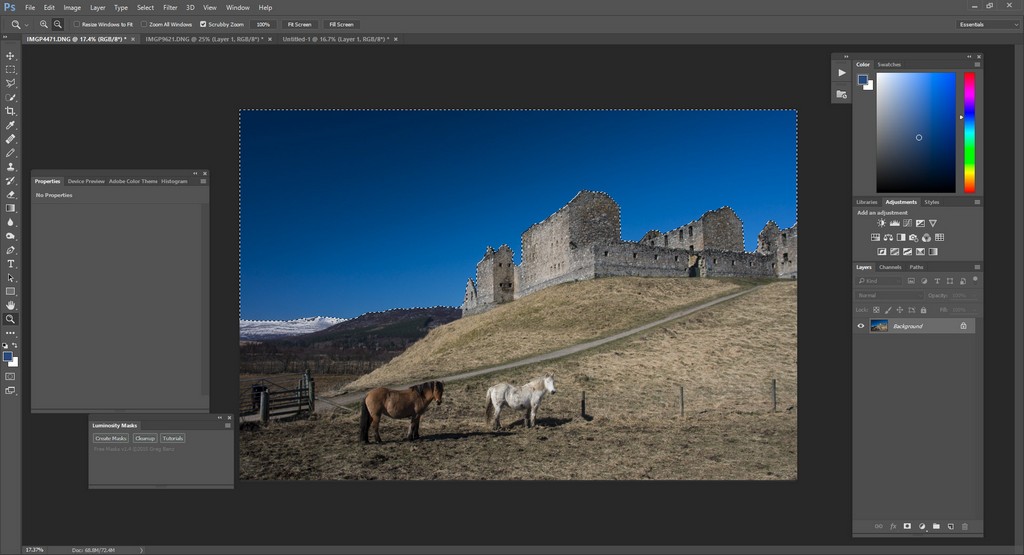
Looking over the image I have found a few problems such as the one below.

These are easily corrected using the lasso tools to add and subtract from the current selection.

I didn’t really explain the different ways you can make a selection very clearly. Photoshop and GIMP have a number of different selection tools such as lasso and polygonal lasso etc etc. I don’t wish to talk about these but what I do want to talk about are the 4 different modes of selection you can make with any of these tools.
Just a note that selections like these are not possible in Lightroom.
Where are they Located?
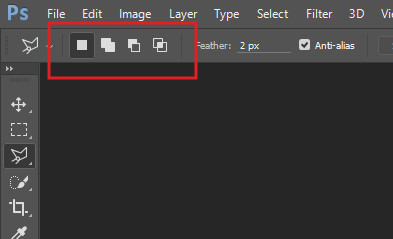
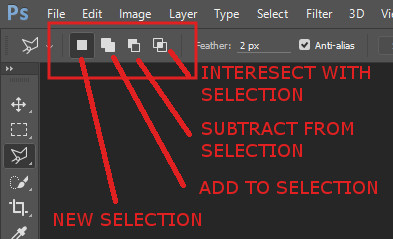
When you go to use any of the selection tools, a set of icons will appear that allow you to select one of the 4 selection modes.
Here they are in Photoshop. They are located in the Options window for that tool.
In GIMP they are in the Tool Options window in the toolbox.

These icons look the same and act the same in both packages so I will only focus on Photoshop for most of this post.
The 4 Modes
Before I go explaining how each of the 4 modes work, it would probably be best to tell you what their names are.
The 4 modes from left to right are:
- New Selection
- Add to Selection
- Subtract from Selection
- Intersect with Selection
Let’s now have a look at all four of these and what they do.
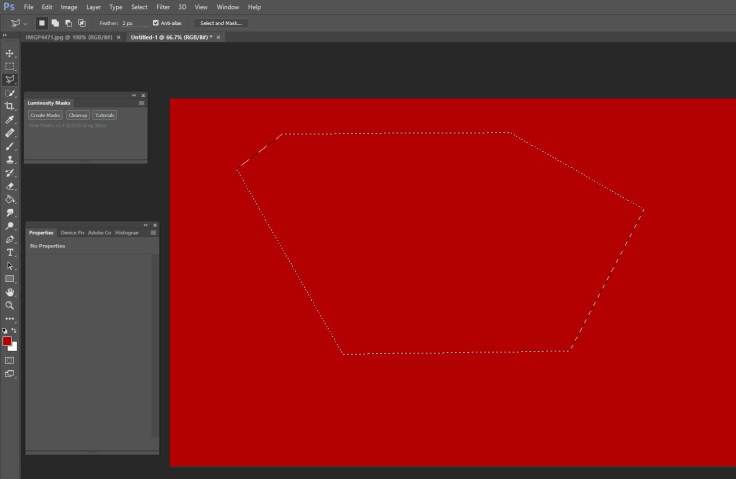
New Selection
With this selection mode selected every time you make a selection, it creates and entirely new selection and removes any previous selections.
So when I use it to make a selection it makes a new selection over the image. (I have used just a blank red image so you can see the marching ants made by the selection)
If I now make another selection which partly overlaps the right side of this selection, it just creates an entirely new selection.

This is the easiest of the four modes to understand.
Add to Selection
The next mode is ‘Add to Selection’. As the names suggests it allows you to add onto a current selection. If you use this on an image with no current selections it will create a new one.
Using the same blank red image with no selections I will make a selection in ‘Add to Selection’ mode. It creates a new selection.

Now, if I create another selection which partially overlaps the right side of the current, it adds that on to the current selection.
Here is the selection being created.

And here is the finalised selection. Notice how it has added the new selection onto the current selection.

Subtract from Selection
As you might guess, this works in the opposite of ‘Add to Selection’ and removes from the current selection.
Again, if you use this mode on an image with no previous selections it will create a new selection. In GIMP, this is slightly different because if you try to create a new selection in this mode when there are no current selections, no selection will be created.
In the same image, with no selections, I will make a selection in ‘Subtract from Selection’ mode. It creates a new selection.

Now, if I create another selection which partially overlaps the right side of the current, it only removes that chunk from the current selection and doesn’t create any additional selections.
Here is the selection being created.

And here is the end result. Regardless of the size of the selection in this mode, it is only the overlapping area which is removed.

The add and subtract modes are most useful when you are refining a current selection as it allows you to add or remove from the selection bit by bit without altering the overall selection.
Intersect with Selection
The last option is one you are unlikely to use very much, (I certainly don’t) but I will explain it anyway. In this mode, only the areas which overlap or intersect in two selections remain in the final selection. The rest is removed
Again, if you use this mode on an image with no previous selections it will create a new selection in Photoshop. In GIMP, it will create nothing.
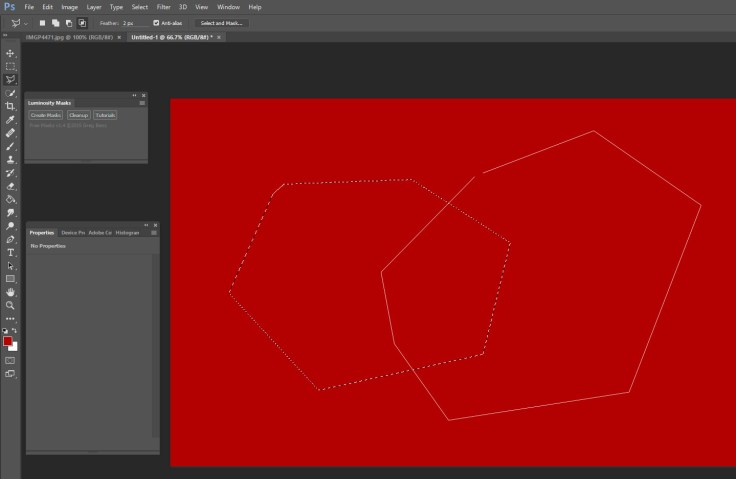
In the same image, with no selections, I will make a selection in ‘Intersect with Selection’ mode. It creates a new selection.

Now, if I create another selection which partially overlaps the right side of the current, it it only creates a selection where the two intersect and removes the rest of the selections.
Here is the selection being created.
And here is the end result. Regardless of the size of the selection in this mode, only the intersecting area of the two selections will remain.

Conclusion
I hope this has helped to understand how these selection modes work. They are really straightforward to use and are a huge help in making and refining a selection. I think the problem is that many people don’t know they even exist.
Thanks for Reading,
Neil


thanks for explaining it!
LikeLike