
You have probably seen shots of water where it looks like surreal glass or mist, or where flowing water has this strange, continuous smeared effect, such as in the photo below.
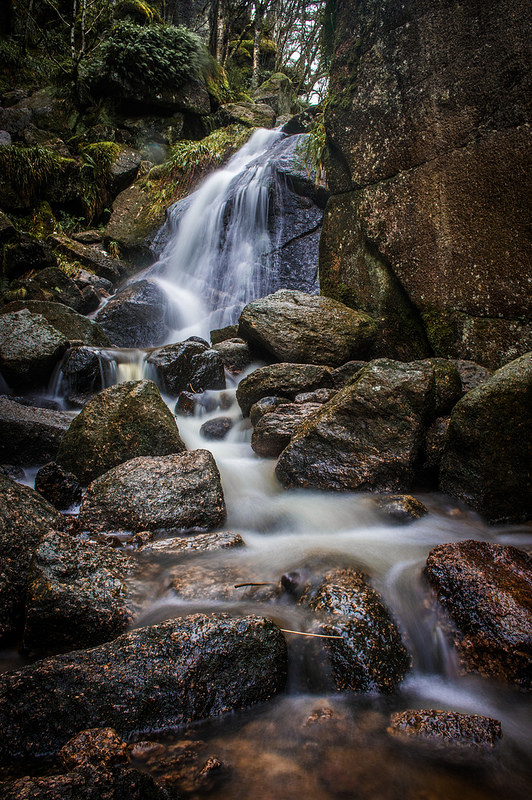
But how do you get an effect such as this? It is done using slow shutter speeds to give long exposure times, and is not, as some believe, some fancy post-processing trick.
By keeping the cameras shutter open for a prolonged period of time, the object in motion (the water in this case) gets blurred and creates this surreal effect.
There is no hard definition for what constitutes a long exposure time or not. I would say it is where the shutter is kept open longer than would normally be needed for a handheld shot but there is no standard definition. However, many long exposure shots will have a shutter speed longer than 1 second.
Long Exposure shots can produce a variety of different with moving subjects but in this post I will look at one of most common applications, especially for landscape photographers, and that is when shooting water.
Static vs Dynamic
All long exposure shots rely on the interplay of the static and the dynamic in the shot. The dynamic elements, such as the water in this case, get blurred with the long exposure time, and it is how these blurred dynamic elements relate to the static elements in the photo (which do not get blurred) which gives it is quality.
If the whole photo was comprised of static elements, the long exposure time wouldn’t create any different effect than a short exposure time, and thus it would be pointless doing it. If the whole photo comprised dynamic elements, everything would get blurred and it would look just a blurred mess.
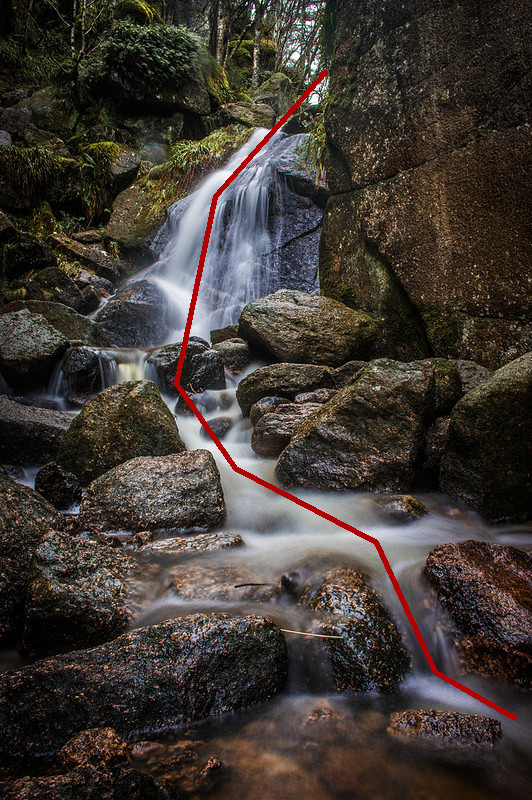
By using long exposure times, the dynamic elements have greater contrast with the static elements, due to the blurring effect, than they would have if you were using faster shutter speeds. You can use this contrast between the two in the composition (see prior post) of your image and create some wonderful shots.
Using the image above you can see how this contrast draws your eye to the blurred water and leads it through the photograph.
Long Exposure Times on Water
Water can create a series of wonderful effects when using long exposures. I will show these below.
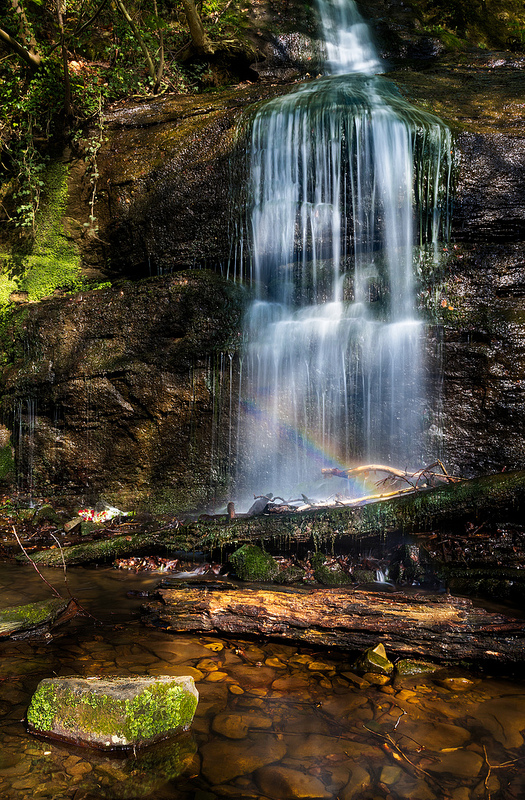
When shooting flowing water, such as a stream or waterfall you get this wonderful streaked effect textured by the lights and darks where the water cascades down.
When shooting more static water such as a lake the water takes on an almost glass like appearance which makes static objects jump out from the photo.
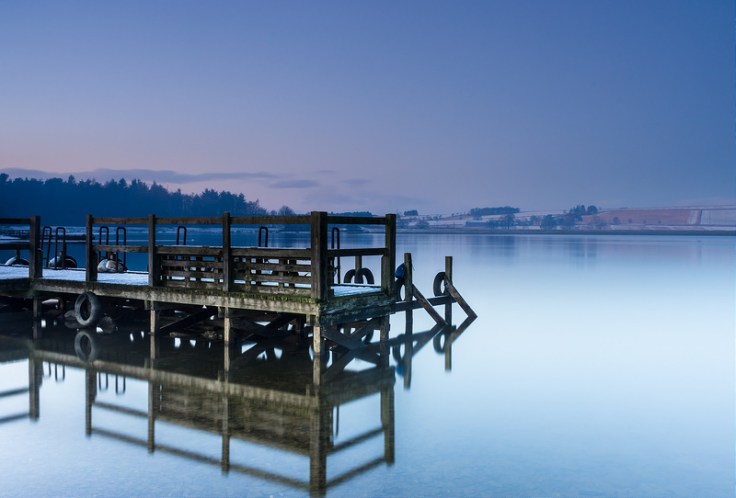
The water in the lake becomes flat and uniform like glass. 30 second exposure, ISO 100, f/22, 10 stop ND Filter
When shooting waves and crashing water, the longer exposure times gives an amazing surreal misty effect.

How to get Long Exposure Times
Depending on the conditions you can achieve long exposure times in a number of ways:
Low Light
If the light levels are low enough you should be able to get long exposure times with a standard camera setup.
Controlling the Aperture
By increasing the f/stop number, thus reducing the size of the aperture, less light gets through the lens which will increase exposure times.
Keep the ISO at it’s Minimum Value
I always recommend keeping the ISO at the lowest value possible to reduce image noise. In long exposure shots, because you are trying to get slower shutter speeds, there is usually no need to have it set to anything other than its minimum value.
Using an ND Filter
I have talked about Graduated Neutral Density filters in a previous post. However, you also get Neutral Density Filters without the graduation. These filters uniformly reduce the amount of light entering the lens. They can be rated in a number of ways so here is a handy table courtesy of http://www.wexphotovideo.com to help:
| F-stop Reduction (EV) | Optical Density (EV) | ND Factor |
| 1 | 0.3 | 2 |
| 2 | 0.6 | 4 |
| 3 | 0.9 | 8 |
| 4 | 1.2 | 16 |
| 5 | 1.5 | 32 |
| 6 | 1.8 | 64 |
| 7 | 2.1 | 128 |
| 8 | 2.4 | 256 |
| 9 | 2.7 | 512 |
| 10 | 3 | 1024 |
In this table, the ND factor is the multiplier on the shutter speed. E.g. if the shutter speed was 1/100 without a filter, adding an 8 stop ND filter would give a 256x slower shutter speed, which would be 2.56 seconds. Of course, you can always stack ND filters if you want even longer exposure times.
ND Filters are almost essential in shooting long exposures especially if you are shooting them in daylight as there is no other way to get a long exposure time without overexposing the photo.
Shoot in Manual or Semi-Automatic
You will probably have to use either manual mode or a semi-automatic mode to shoot long exposure shots. In automatic mode, the camera will seek a quick shutter speed and make the necessary adjustments to the setup to do so which is no good. In manual or a semi-auto mode you can control the setting to get a long shutter speed.
Use a Tripod
This is essential for doing long exposure shots. As the shutter speeds will be very slow there is no way you can keep the camera steady handheld or even with a monopod. Thus, if you want to try this type of photography you will really have to invest in a tripod.
What is a Good Exposure Time?
The length of exposure time will have a differing effect on the final image. What is the ideal exposure time will depend on your artistic preferences, but don’t always assume that the longer the exposure time, the better the effect you will get. Here are some examples of a waterfall taken at different shutter speeds. Click the photos to get a larger version and info on the shutter speed.


As these photos show, keeping the shutter open longer produces more blurring and reduces detail. However, sometimes retaining a bit of detail can produce a more pleasing artistic effect. Of the 4 photos above, I prefer the one shot at 1/4 second. The water has enough blur to make it contrast with the surrounding rocks, but not so much that it becomes a surreal, gooey streak.
Conclusion
I hope this post has served as a helpful introduction into long exposure photography on water. It is a fun effect to play around with and can produce wonderfully surreal images. Here are a few more long exposure examples below.


Thanks for Reading,
Neil


Nice photos!
LikeLiked by 1 person
Many Thanks.
LikeLiked by 1 person
some really awesome examples, makes me want to run to the shore!
LikeLiked by 1 person
Thanks. We certainly have plenty of shoreline for taking photos. Just need the rain to let up for a while.
LikeLike