
One of the biggest issues in landscape photography is dealing with the sun’s intensity and brightness. Even when it is low on the horizon and it’s intensity is lessened, it will still create too much contrast between the sky and the foreground when you are shooting into it. What you will end up with is the sky either blown out into a sea of white, the foreground underexposed and far too dark, or both depending on how you meter the light.
So is there any way around this problem? Yes and no. If the sun is too high in the sky and too bright it might be worth forgetting about the shot unless you deliberately want to create a specific effect such as silhouettes. However, if the sun is still low in the sky and less intense you still might be able to get a decent shot but it will probably require some work.
You can lessen the brightness of the sun entering your camera by using Graduated Neutral Density filters, or you can correct the contrast difference later in post-processing. Or, as I am about to show, you can do both.
Picture the Scene
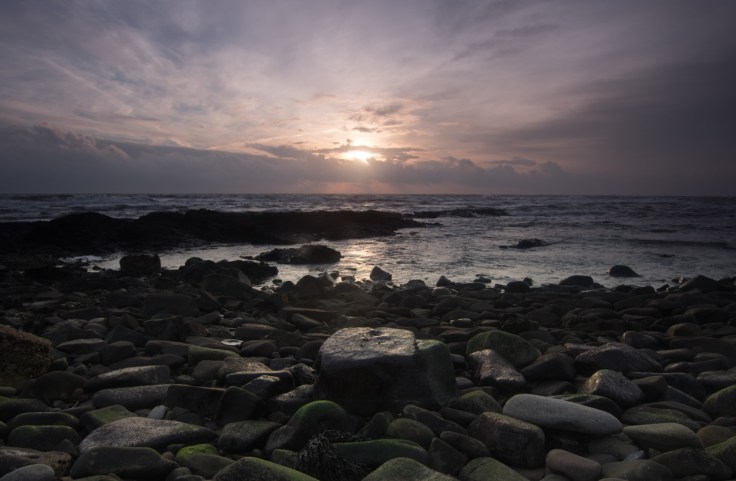
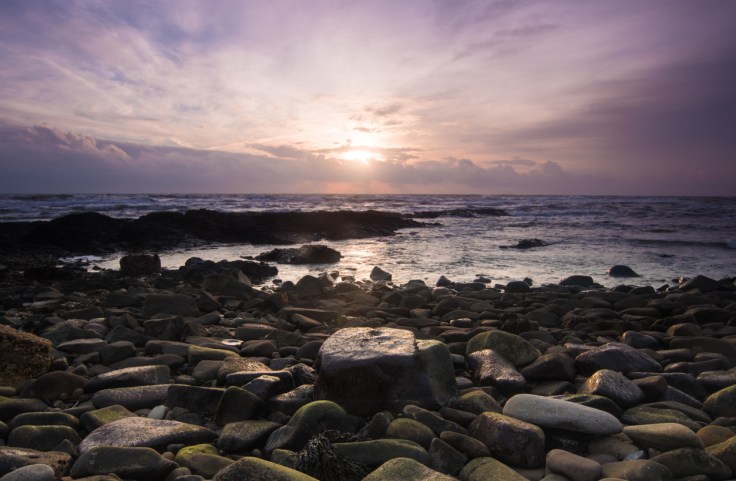
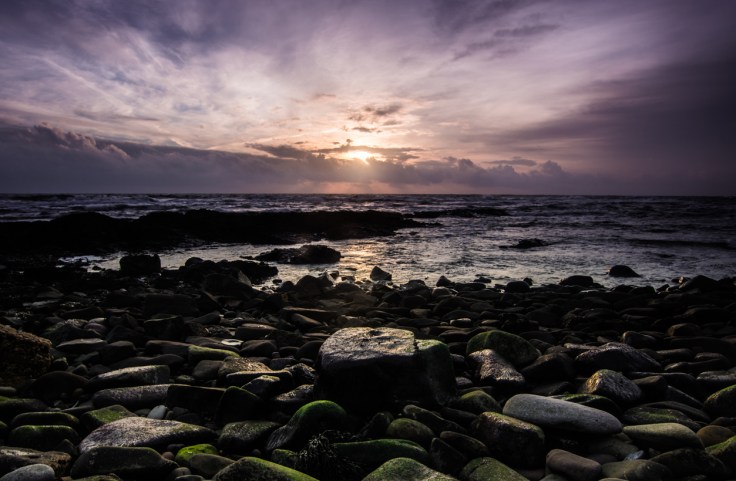
It was a cold winters morning down at the beach. The sun had already risen but it had not reached such a significant intensity that you couldn’t still get a good photo (with a bit of work). The scene looked wonderful to the human eye; the sun breaking through the clouds in the sky and illuminating the rocks on the beach. However, as a digital camera cannot doesn’t have the dynamic range of the human eye any shots I took came out with too much contrast between the sky and foreground.
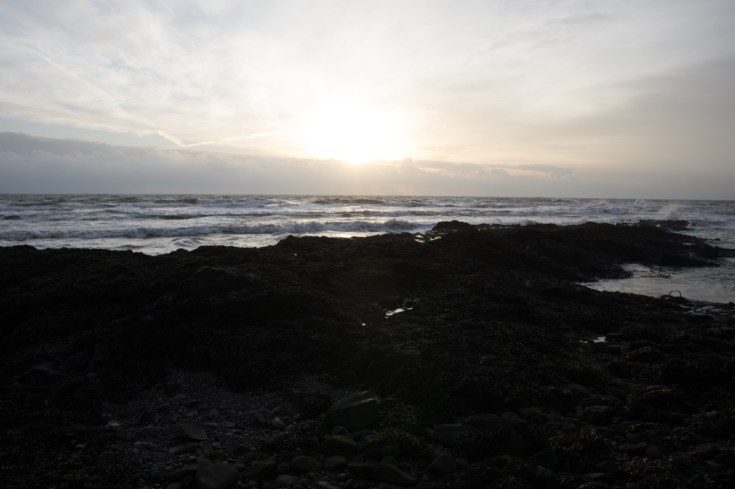
I therefore put on a strong graduated neutral density filter to lessen the light coming into my camera from the sun and sky. The results had more balanced exposure but still had too much contrast, so I decided to take a series of different exposures with a view to combining them together later. This is what the results were:

Even with the neutral density filter none of the single exposures were what I was looking for as they all still had too much contrast between the sky and the foreground. However, within these three images there was a well exposed sky and foreground. It was now just a case of cobbling these parts together to make a single well exposed image.
Note: It may be tempting to just shoot one image and do all the processing to that. However, with the huge contrast you will need to either significantly darken the sky or lighten the foreground, or probably both. Such significant adjustments to the luminosity will add a huge amount of noise to your image potentially ruining it. Moreover, there is a good chance the sky will be blown out and unrecoverable. If there is significant contrast between the sky and foreground I would always recommend shooting a number of different exposures.
Different Ways to Merge Together
There are different ways to merge multiple exposures. You can use HDR (High Dynamic Range) software which will merge the images and pump out a single processed image. I find HDR software to be quite hit or miss (mostly miss in my case) so I don’t normally use it. Or, you can merge them manually using a image processing software which allows you to work with layers such as Photoshop or G.I.M.P..
Another option is to use Adobe Lightroom’s HDR function, which merges the images into a single 16 bit floating point RAW file which can hold up to 30 stops of data. However, it doesn’t perform the exaggerated processing that other HDR software does, leaving you with a RAW file similar to your base images that you can then process to your liking. This is a wonderful feature as it aligns all the images together and gives you a great starting point for further editing.
My usual workflow is to use Lightroom’s HDR function to merge the images into a single RAW file then process that RAW file to create numerous different images with different parts of the photo processed to my liking. I then merge these images in Photoshop.
I know this may seem like I am going back and forward for no reason, but I will take you through the steps and hopefully you will see why I do it.
Bringing them Together
Firstly, I merge the three images using Lightroom’s HDR function. What I get is a single RAW file with all the images aligned and the wider dynamic range of data within it. I personally don’t like Photoshop’s alignment functions and this is one of the reasons I use this feature in Lightroom.
Next, I use Lightroom to level the horizon and crop it slightly as I think there is too much rocky beach in the foreground.
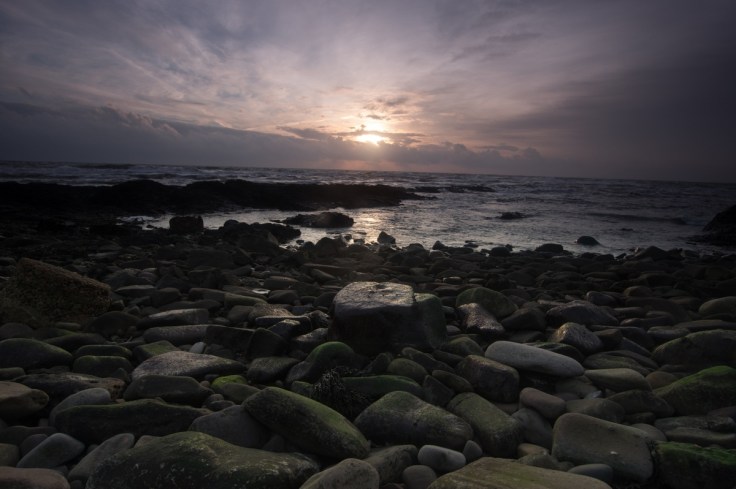
Next, I process the RAW file in Lightroom so that I have a well illuminated foreground. Remember, this RAW file contains all this image data of the merged photos, so it doesn’t pick up excessive noise when I do this, which would happen if I did this in Photoshop. I also boost the contrast, sharpness, take out some of that yucky green colour on the rocks, and push the colours over towards magenta to match the colours in the sky.
I then import that image into Photoshop for later editing.
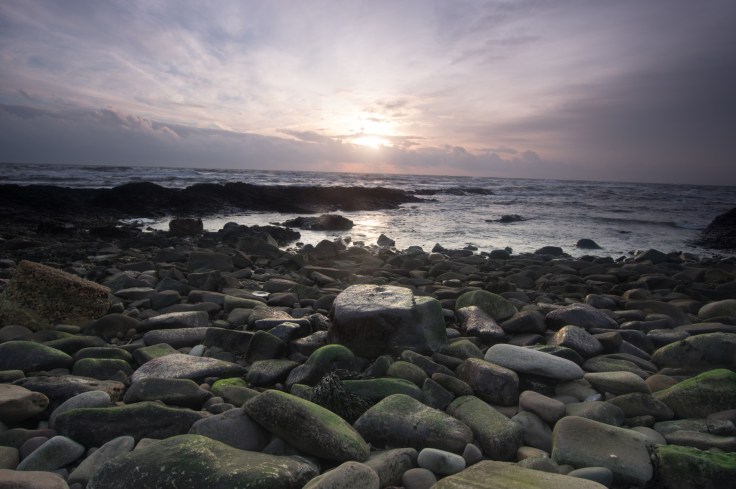
The changes have left the sky looking over exposed and lacking contrast so next, I undo that processing and process the RAW file in Lightroom so the sky looks good. I get the exposure to my liking, and boost contrast and saturation. Notice however the foreground is too dark in this image.
I now import this image into Photoshop.
The reason I don’t just edit it as a single image in Lightroom is because I feel Lightroom’s local adjustment tools are too imprecise and it produces a better result merging the images in Photoshop.
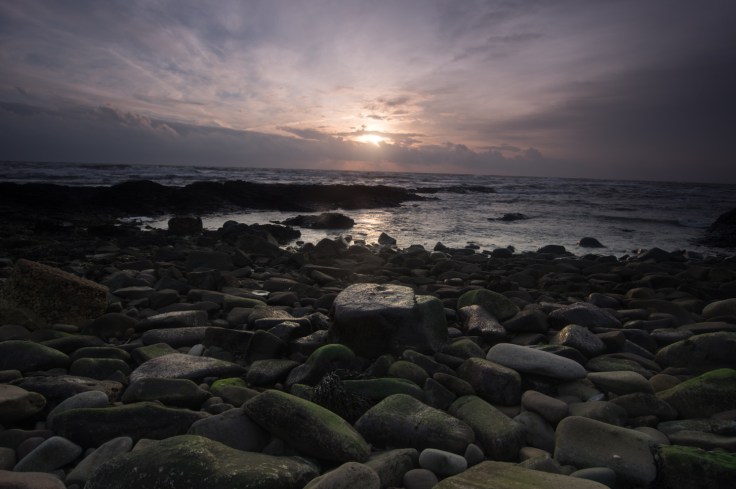
Now, I have two images in Photoshop. One with a good sky and one with a good foreground. I now just combine them together by making them two individual layers and using a layer mask. And this is the result.
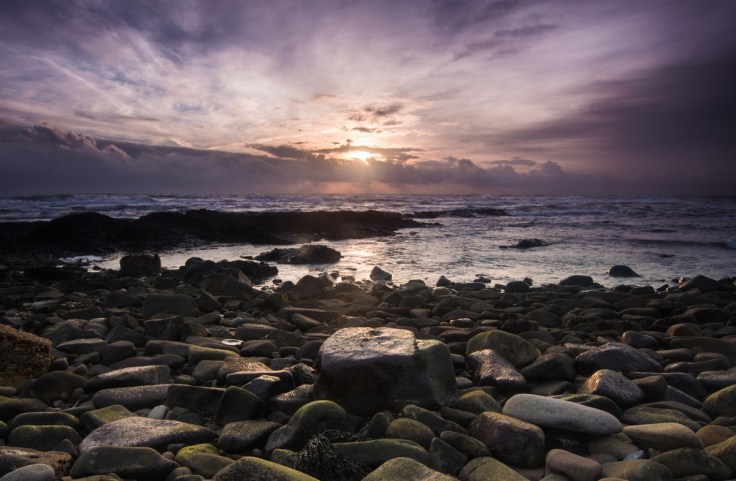
Now I have a well exposed image which has a sharp, almost noiseless foreground, and a brooding sky. I just have to make some more tweaks in Photoshop to finalise the image.
Alternative Method
You don’t have to use Lightroom’s HDR function. You could edit the differently exposed images individually in Lightroom, then import them into Photoshop, make them different layers in the same image, and then use Photoshop’s auto-align function to align the layers. Then you would use layer masks to add or remove the different parts, just as I did here. I just prefer this method as I think it’s easier and gives better results.
The Finishing Touches
The first thing I notice is there is slight lens flare over the rocky out crop near the horizon. I just use the burn tool to darken it away as much as I can. Then I do a bit more dodging and burning to bring out some the details more.
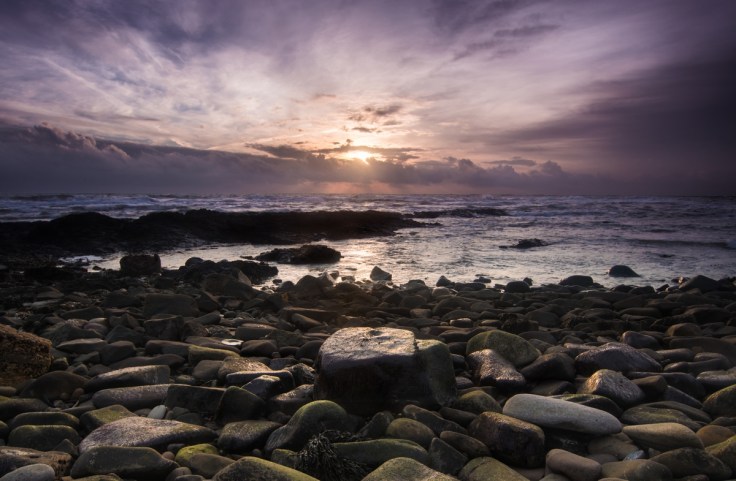
Next, I give the colours a tweak. I firstly up the colour saturation. I then push some orange into the shadows and purple into the highlights to help unify the overall colour scheme, and add a bit of warmth to the foreground.

Lastly, I do some selective sharpening in the foreground, and a bit of noise reduction in the sky (the contrast boosting in the sky led it to pick up some noise). I then add a vignette to draw attention into the center of the image, and add one final small boost to the contrast in the foreground and voila, it’s finished.
I hope this tutorial has been helpful in showing you how to merge multiple exposures into creating a single, more balanced image. I also hope I have been able to demonstrate that you can bring out a well balanced exposure even when the sun initially appears too bright to do so.
Thanks for Reading,
Neil


Lovely post.
LikeLiked by 1 person
Thank You
LikeLike