In the previous two parts, I first looked at layer masks and luminosity masks, I then looked at using luminosity masks to perform exposure adjustments in an image. Following on from this, I will now look at using luminosity masks to blend two different exposures into a single image.
Taming the Sun Again
Often when taking photos you will have the problem of sky being overexposed and/or the foreground being underexposed due to the luminosity of the sun. One way to rectify this problem is to shoot multiple shots at different exposures and blend them together later in post-processing software. I talked about this previously in this post.
One such way of blending them together is by using luminosity masks and they can prove to be extremely useful especially if dealing with detailed objects.
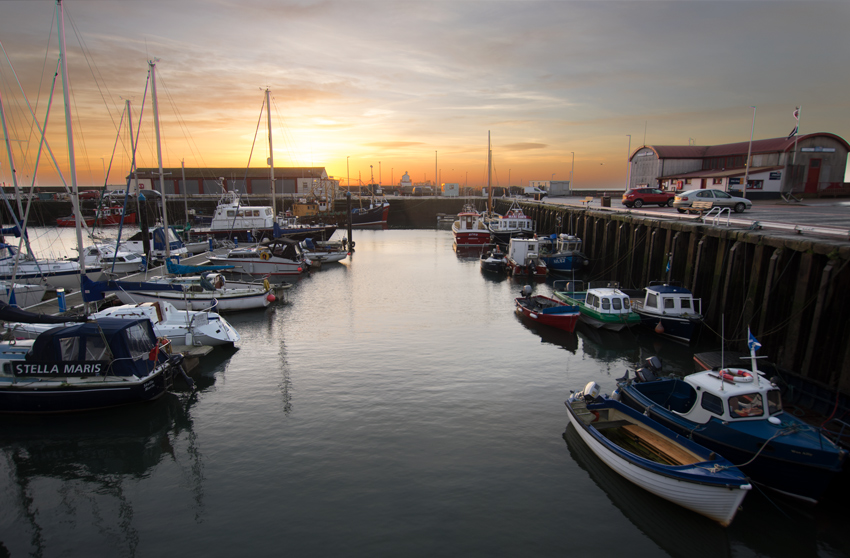
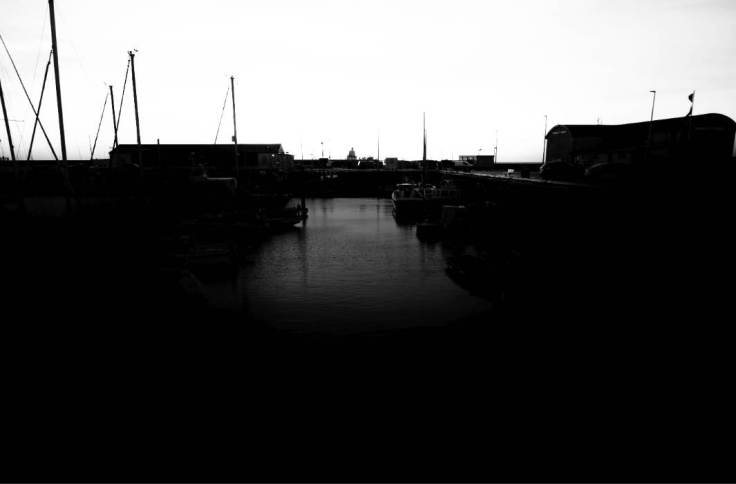
Here are two photos taken of Arbroath Harbour. The first has the boats and harbour in the foreground well exposed but the sky is totally blown out.
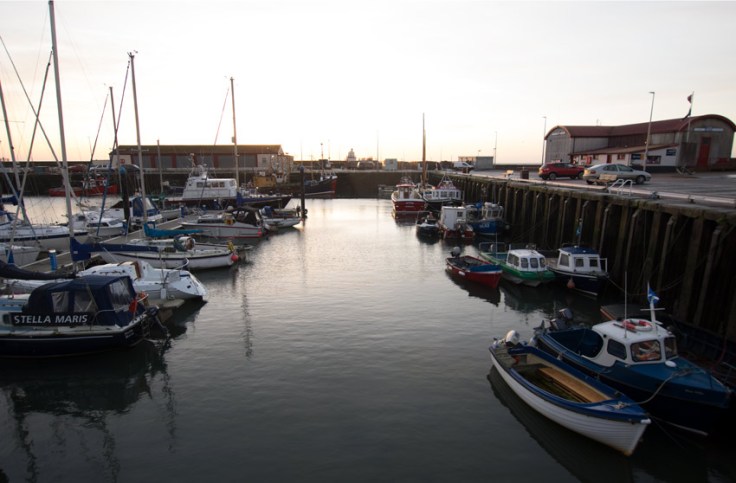
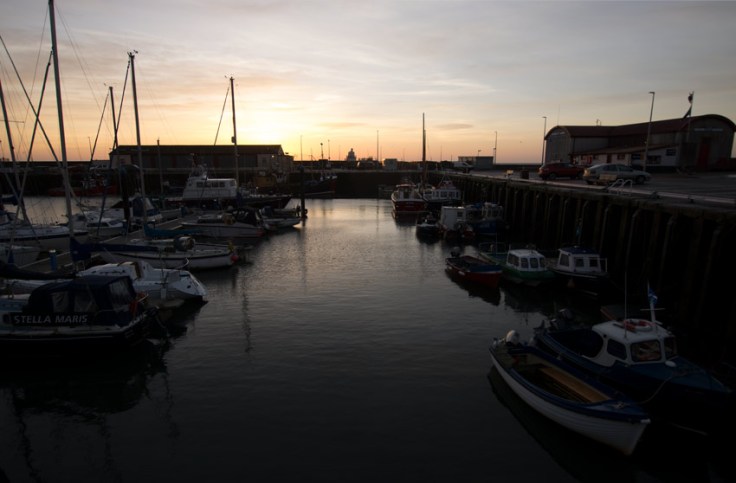
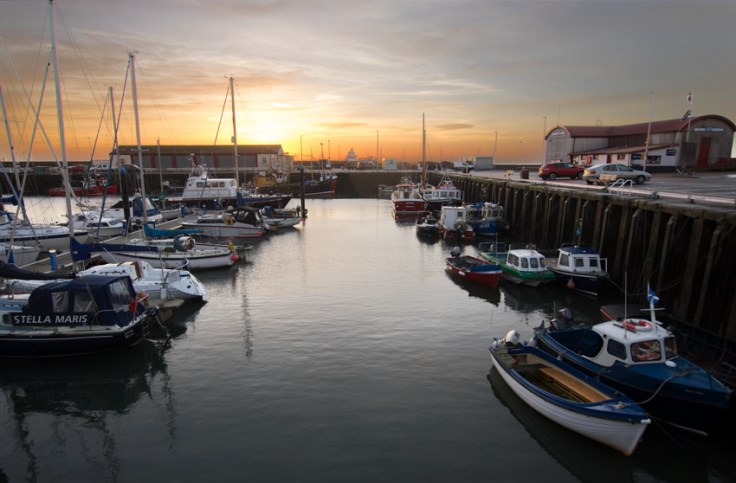
The second photo has the sky well exposed but the foreground is underexposed.
What we want to do is merge the well exposed sky from one image with the well exposed foreground from the other, and we are going to use luminosity masks to do this.
Although you could merge the images by using selection tools and cutting out the sky area, this can be problematic and very time consuming when you have complex intersecting objects such as the boat masts in this image. Luminosity masks offer a quick and effective way to overcome this.
Align the Images
The first thing you have to do is import both images as separate layers into Photoshop. Once this is done you now have to align them so they overlap exactly. Select both layers and use Photoshop’s Auto-Align Layers feature in the Edit menu. Although this isn’t totally foolproof it should align them adequately providing there is not a huge amount of movement between the two images.
It is best when shooting multiple exposures to use a tripod so that there is no movement between the different images. However, it can be done handheld and the layers aligned later. If shooting with a tripod, I would still recommend using the Auto-Align feature in Photoshop just in case there was small movement due to wind.
Having the layers aligned is essential because if they are not, when you come to merge the exposures, parts of one image will start appearing in the wrong place in the other.
Dark to Lights or Lights to Darks?
Now that we have our images aligned we now need to create the luminosity masks. However, we now have a choice of images from which to create the masks from and this will affect how we blend the images. We can either create the masks from the image with the overexposed sky, or masks from the image with the underexposed foreground.
If we use the former we will have to merge in the sky, if we do the latter we will have to merge in the foreground. I recommend using the first method as the sky is far less complex than all the detailed objects in the foreground and thus it should be quicker to do and less problematic.
Therefore, I select the first image and run the Photoshop action to create the luminosity masks. Here is the result in the channels tab.

Selecting the Mask
As I said above, we are going to merge the sky from the second image into the first image, and have created appropriate luminosity masks to do so.
Now we need to select an appropriate mask to use. As we are merging the sky, I want a mask where the sky is white and the foreground is dark. This will allow the sky to show through the mask.
I have chosen the lights(3) mask as the sky is very bright in it but the foreground very dark.

Merging the Images
You can merge the two images quickly just by fully applying the luminosity mask as a layer mask onto the sky layer. Although this gives a not bad result there are problems with tonal compression in the foreground, especially in the water, caused by adding a dark layer using a light mask.

Using Luminosity Masks as Selections
A better way to do this is to only apply the blending effect to specific areas of the image. To do this, we add a pure black layer mask to the sky layer. Now, in the channels tab I alt-click the lights(3) channel. This now makes the luminosity masks a selection as is shown below.
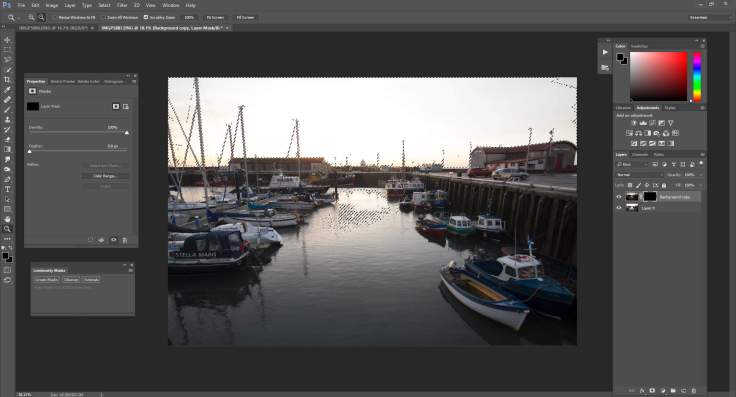
Now with a soft, white paintbrush with its opacity lowered we can gently paint into the blank layer mask with the areas we want to come through. As the luminosity mask is now a selection, it limits what comes through when painting.
So, I paint into the sky area to bring this through, and also very slightly into the waters highlight just to soften it slightly. Here is the result. Notice how the highlight areas in the foreground have not been adversely affected as in the previous example.

And here is how the layer mask looks after I have painted through with the luminosity mask selected. Notice how the luminosity mask helped contain the painting to only the light areas.
And this is really the basic techniques for using luminosity masks to blend different exposures. As you can see, they provide a quick and effective way of blending multiple exposures with a natural look and work well around complex objects such as the ships masts.
Using the Masks for the Edges
Using luminosity masks as selections is certainly a preferred way of using them as it allows more control over their application. As such, sometimes it is worth just using around the edges of the images to be merged only. For example, if you have a sky and foreground, just use the luminosity mask along the edge to be merged to give that smooth transition, then deselect it and paint the rest of the area in manually. This is a helpful method if the luminosity mask has more tonal variation, as you can get significant tonal compression if you use it to paint in the whole area.
Check Your Edges
There is however a downside and that is the problem of tonal compression as I have mentioned previously. So when you do an exposure merge using luminosity masks, check the edges where you have done the blending as there may be some unwanted effects. If there are problems, they may need a bit of manual correction. Here are a few from the image above.
The first is an abnormal fringing which has appeared around part of the harbour. This can be tidied up using the clone and heal tools. Or, a method which may be more preferable is to take a soft brush with lowered opacity and gently paint black back into the area (without a luminosity mask) to lessen this effect.

The second is around the masts where the chromatic aberrations have been exaggerated. Again, this can be fixed in the same way as above.

These are just very minor details which are only evident when the image is zoomed into. If you want to be thorough you can rectify them, but if they are this small it may be best just leaving them. However, they are worth noting and always check for these when doing exposure merging as they can ruin an image if they are more significant.
Further Processing
Now the images have been merged, the photo can now be further processed and the good thing is that you still have the sky and the foreground on two separate layers which can be altered in isolation. By adding just a simple curves adjustment to the sky layer to boost contrast, and another curves adjustment to the foreground layer to brighten it up, I can affect these areas individually and still have that nice smooth transition from using the luminosity mask to create the layer mask.
Conclusion
That is pretty much all for these posts on luminosity masks. I hope they have been helpful in understanding what these masks are and how best to use them.
These luminosity masks can be an extremely helpful aid, but they can also have some significant drawbacks. They are not a panacea to all your exposure corrections as some advocates may tell you but they are a handy tool to have at your disposal in your post-processing toolbox.
Thanks for Reading,
Neil


Leave a comment